
This post may contain affiliate links. Please read our disclosure policy.
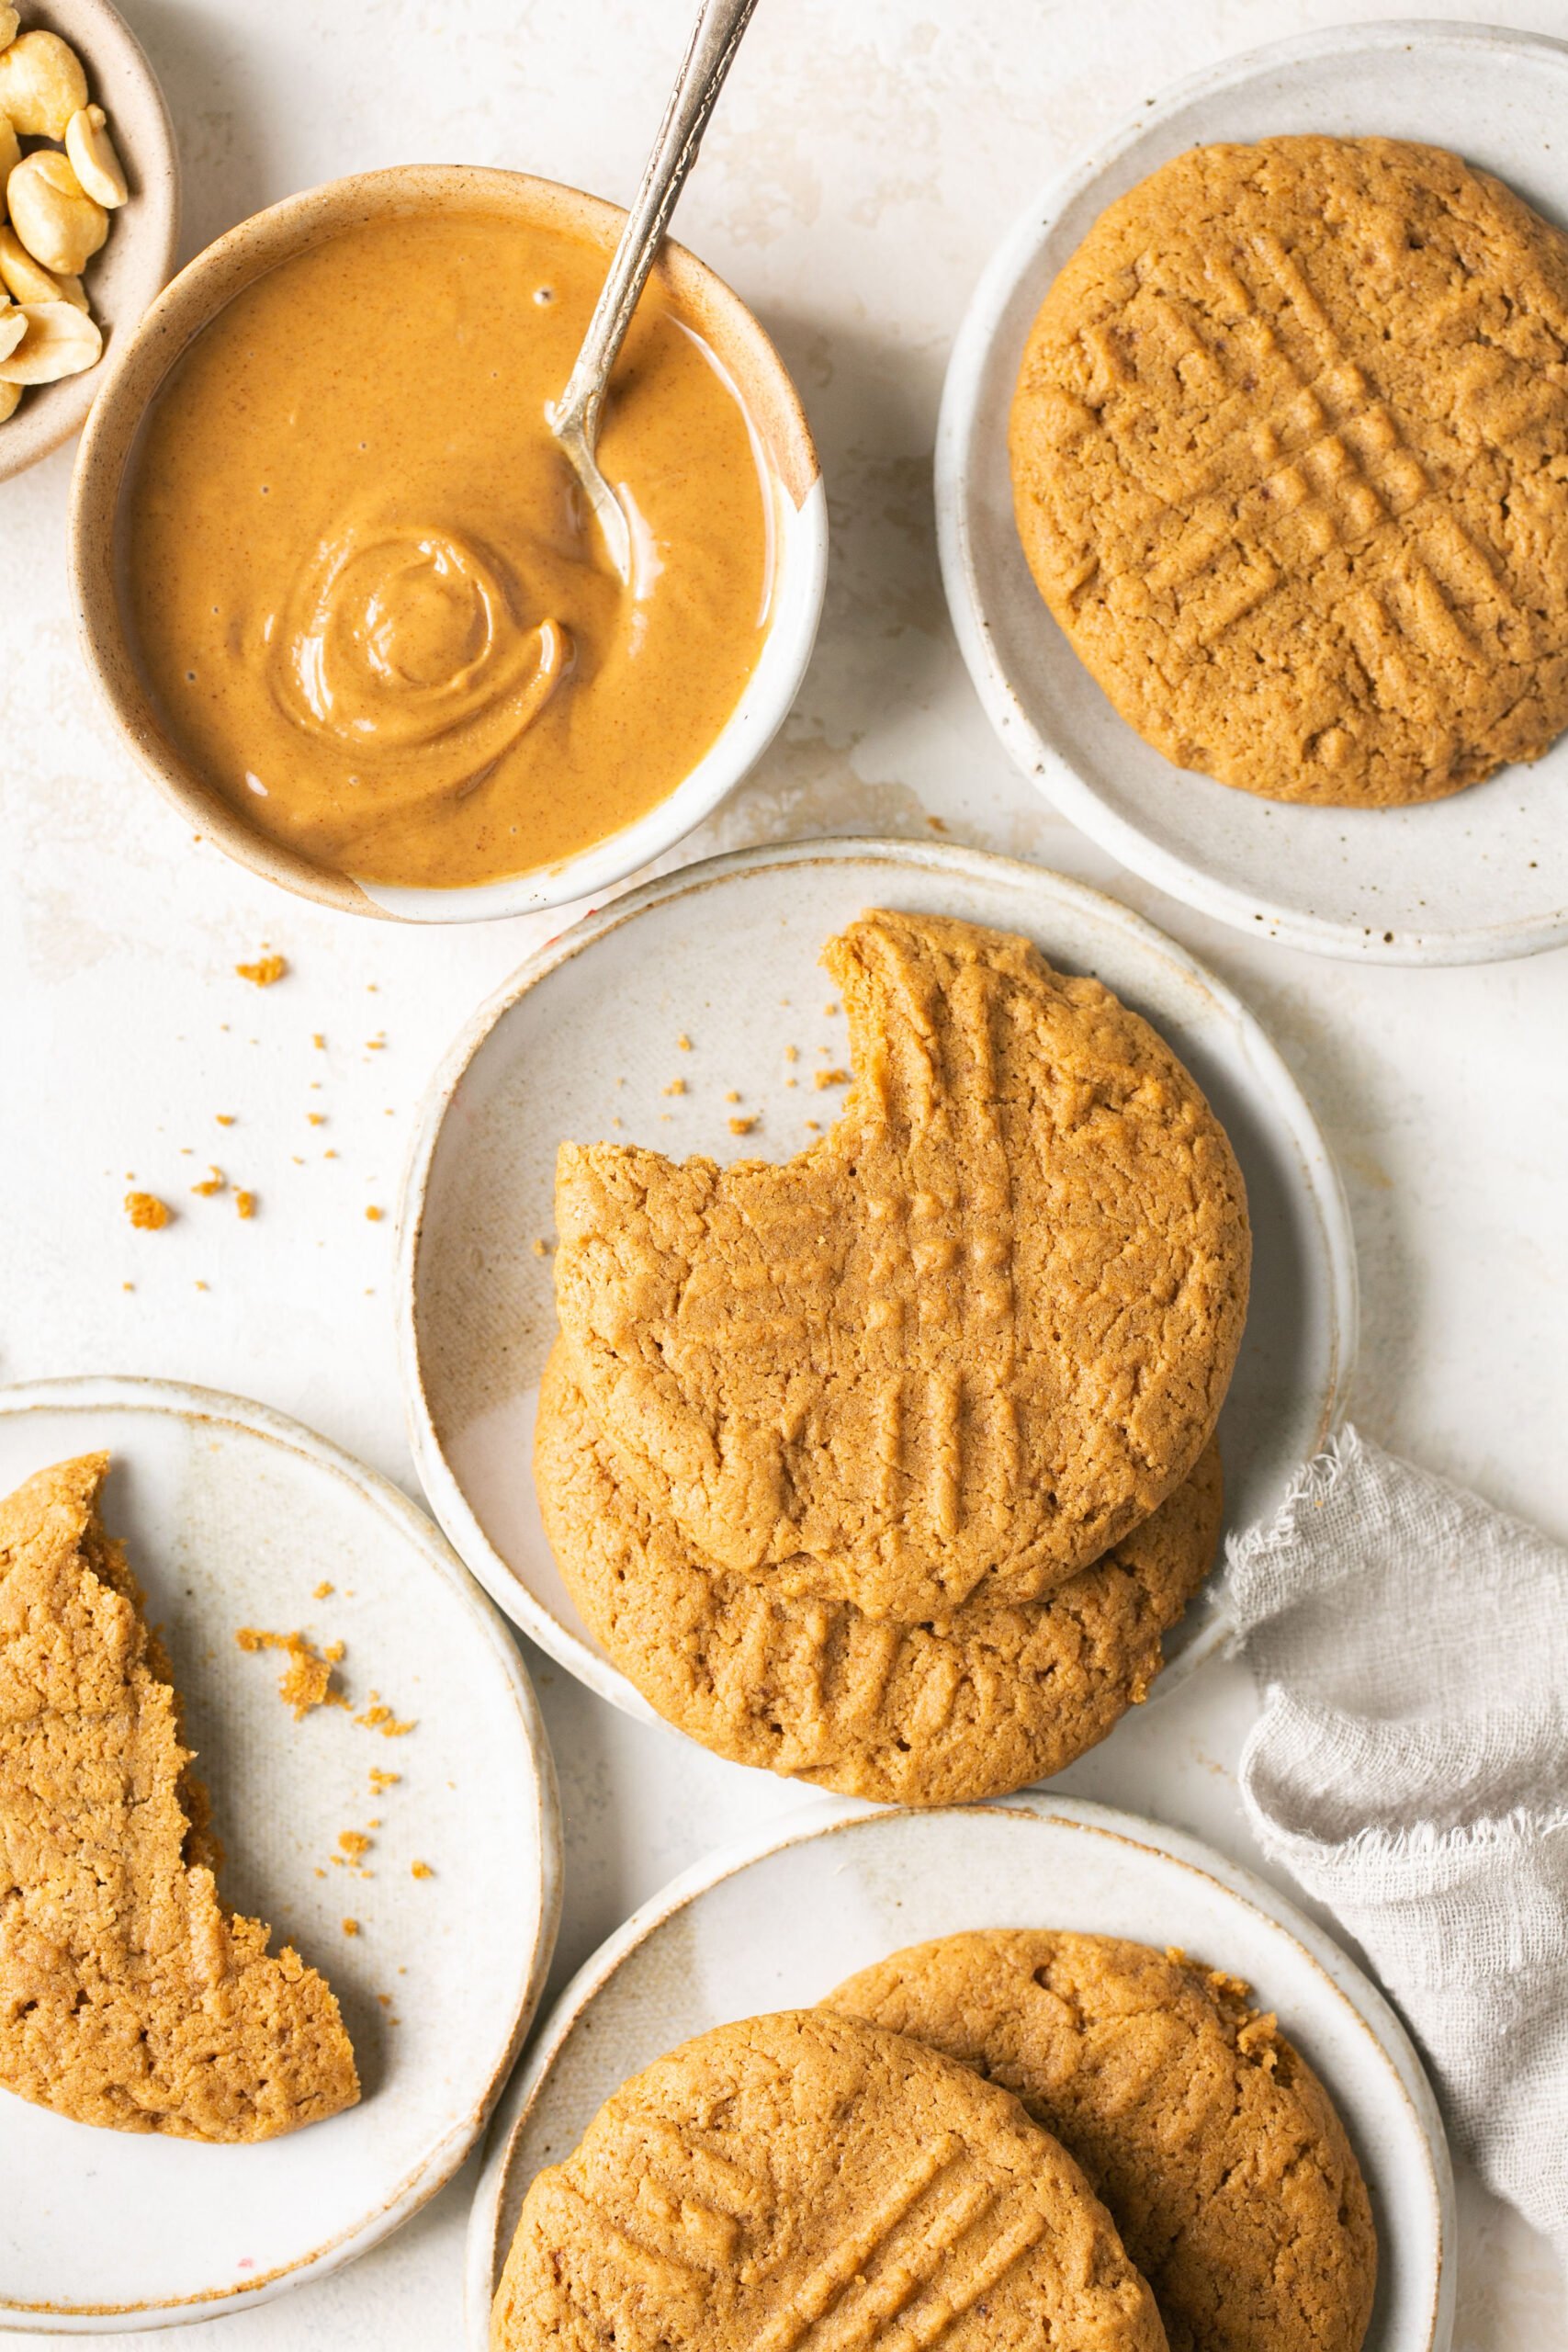
Turn your kitchen into a bakery with these simple, 20-minute gluten free peanut butter cookies. Everything you love about fresh-baked, homemade cookies- Soft, chewy, and absolutely perfect!
Why You’ll Love This Recipe
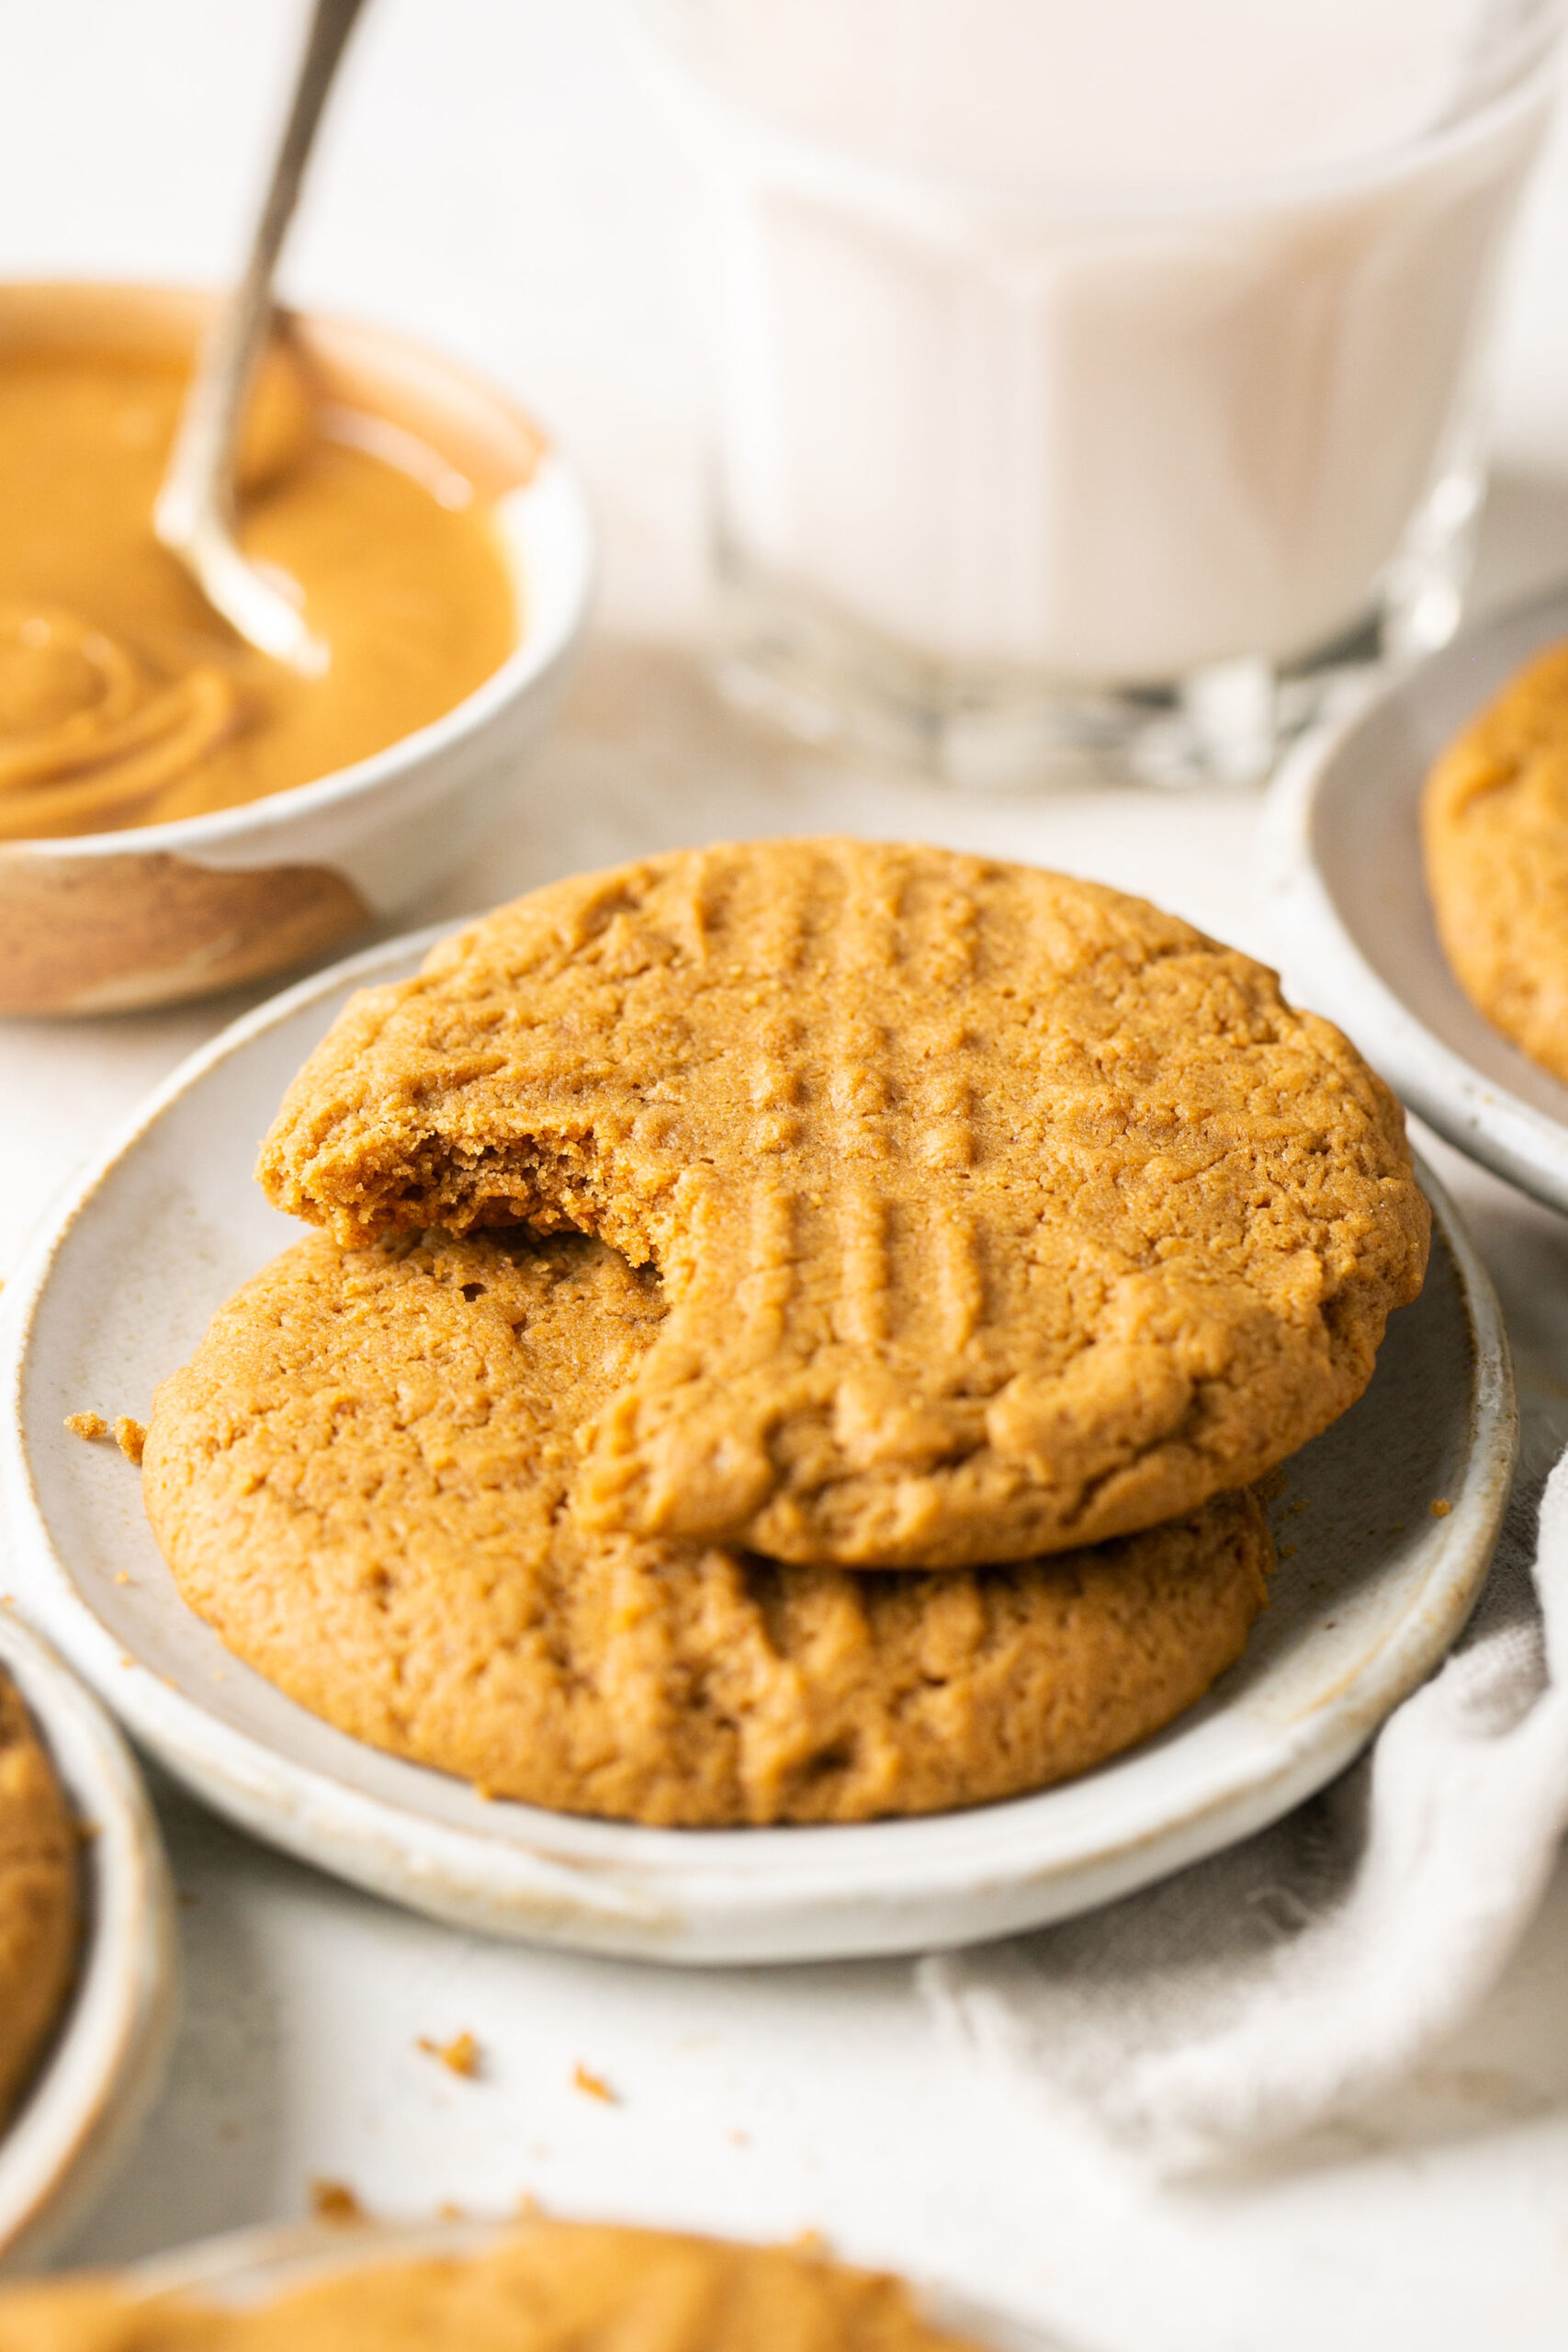
There’s really nothing better than fresh-baked, homemade cookies warm out of the oven with a glass of (almond) milk. However, when you’re eating a gluten-free diet, these yummy indulgences aren’t as easy to achieve.
Enter, my famous peanut butter cookies! “Famous” is relative, of course, but they sure are popular in my house and with my friends and family.
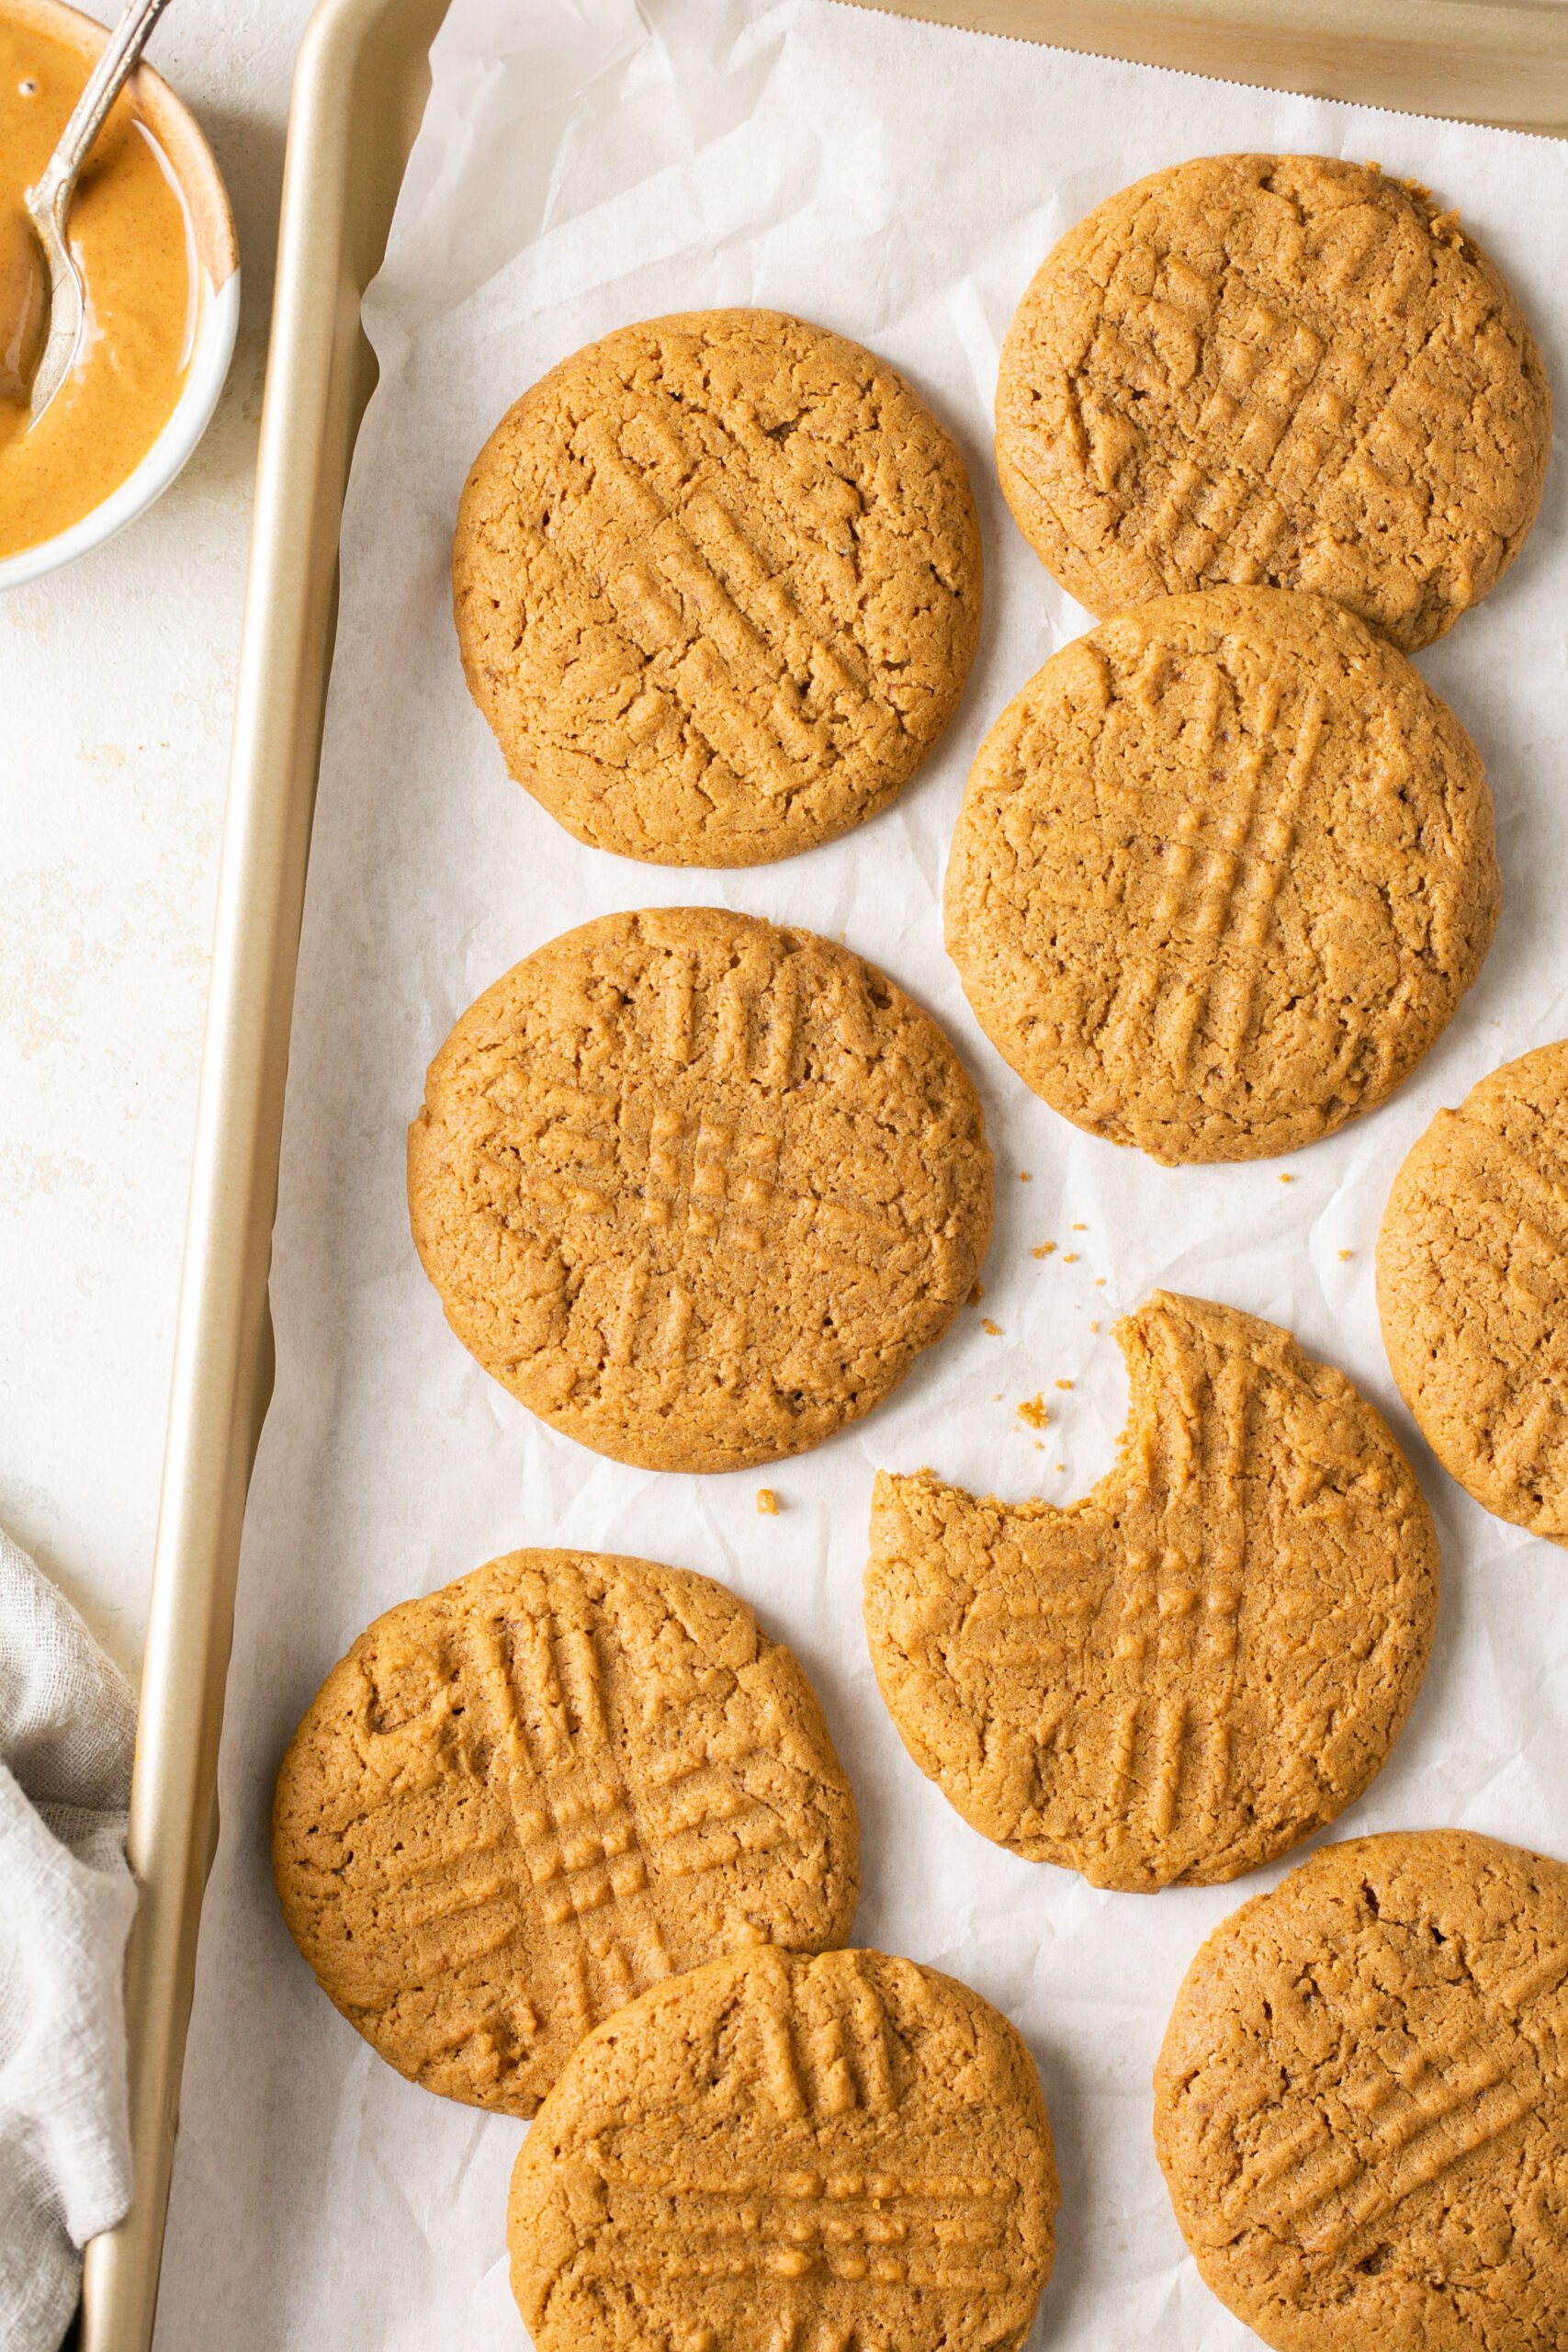
These gluten free peanut butter cookies are soft and chewy like the cookies you love, freshly baked with delicious flavor, and they’re gluten-free! Chances are, no one will even know the difference; they’re that good.
Looking for even more delicious gluten-free cookies? You’re in luck! I have so many wonderful options from these Italian wedding cookies to these chocolate chipless cookies, and dare I say the BEST gluten-free chocolate chip cookies.
Recipe Highlights
- Peanut Butter is naturally gluten-free food!
- Soft, chewy middles with perfectly crisp edges.
- Taste like your favorite bakery!
- Add chocolate chips or nuts for extra gooey goodness.
- Easy, 20-minute recipe!
Ingredient Notes
See the full list of ingredients in the recipe card below.
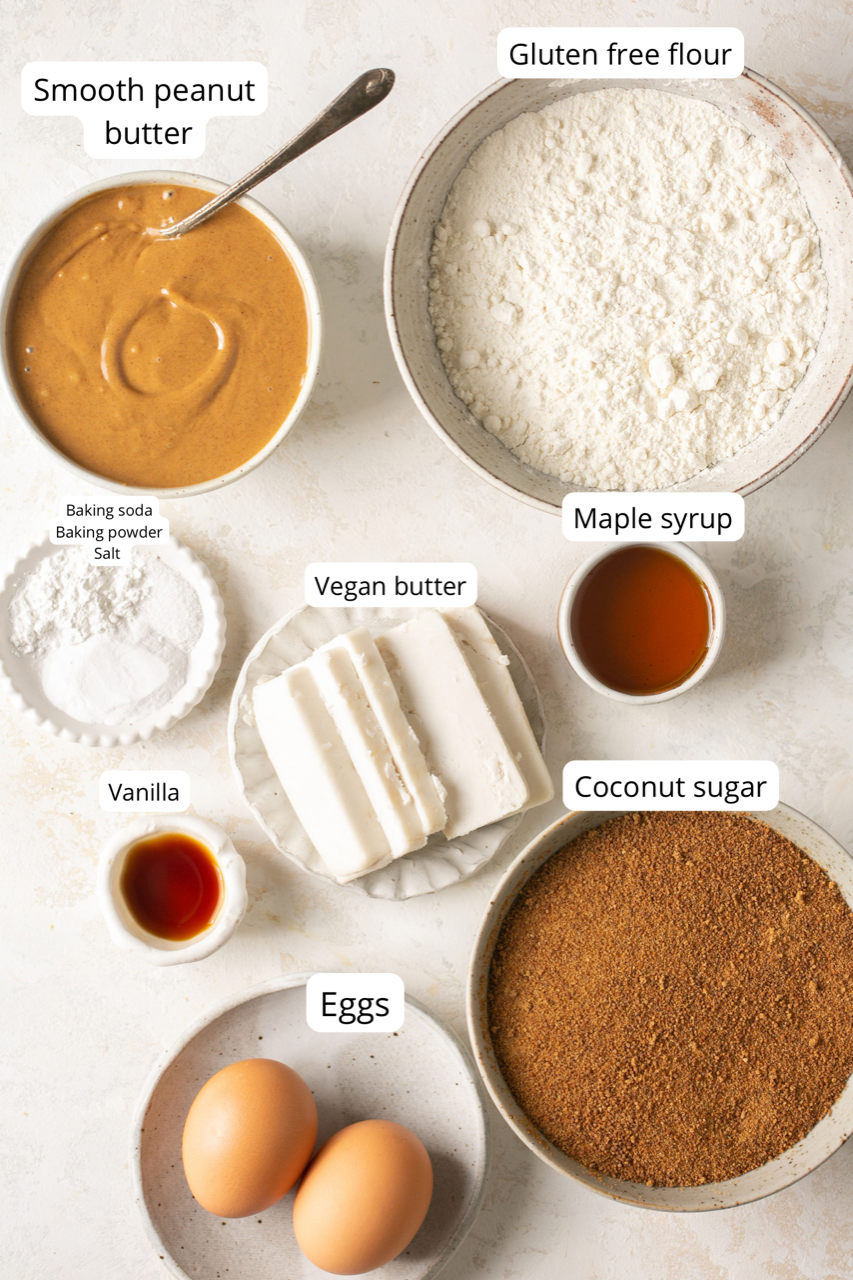
- Vegan Butter: I like Miyokos or Kite Hill brands, but feel free to use your favorite. Make sure to use cold butter, as this will keep the cookies from spreading too much while baking.
- Gluten-Free All-Purpose Flour: I like the King Arthur brand. It’s a certified gluten-free 1:1 flour substitute and you don't need to add any additional ingredients.
- Creamy Peanut Butter: Make sure to use a brand that isn’t too liquidy or drippy or these cookies might not turn out so well! Try to find a brand like Justin’s that is a little more solid. If it’s natural peanut butter, make sure to stir before measuring. You could use creamy or crunchy peanut butter depending on your preference.
- Coconut Sugar & Maple Syrup: These unrefined sweeteners give these peanut butter cookies a deep, delicious flavor without needing brown sugar or granulated sugar.
- Vanilla Extract: What is a cookie recipe without vanilla extract? Costco sells a huge bottle for a great price. I also like to get organic baking staples from Thrive Market.
How to Make Chocolate Chipless Cookies
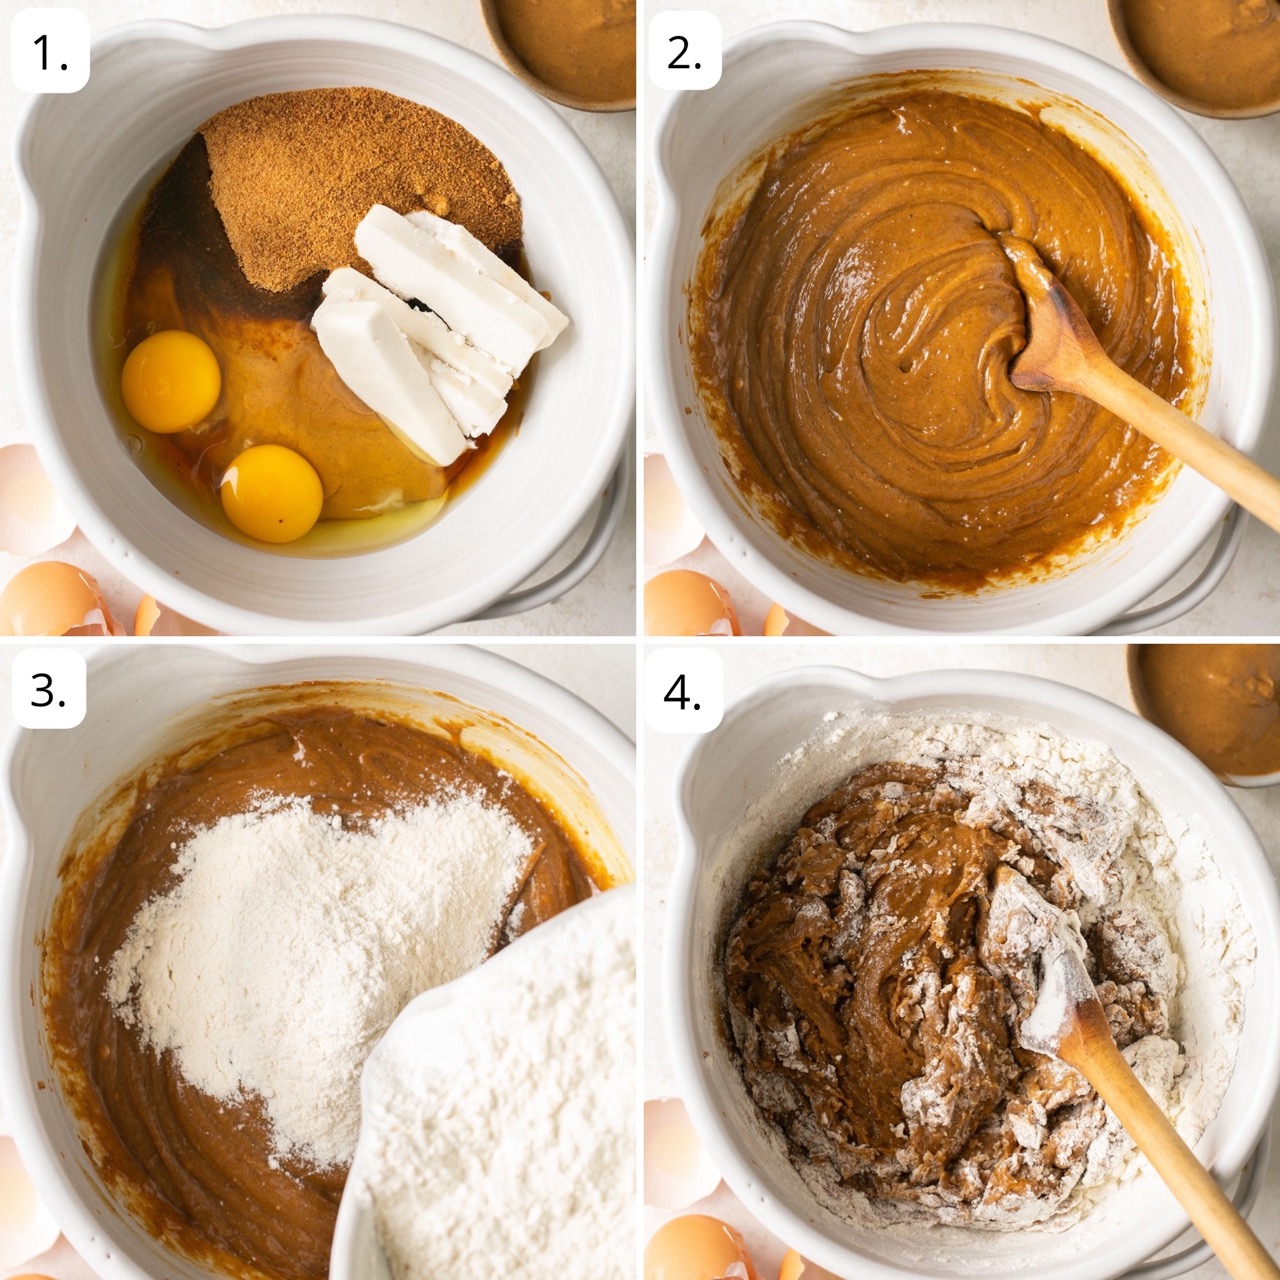
- Preheat your oven to 350.
- Combine the peanut butter, coconut sugar, maple syrup, vegan butter, vanilla, and eggs in a bowl and mix well.
- In a separate bowl, combine the gluten-free flour, baking soda, baking powder, and salt and mix.
- Add the dry ingredients to the wet and stir to combine.
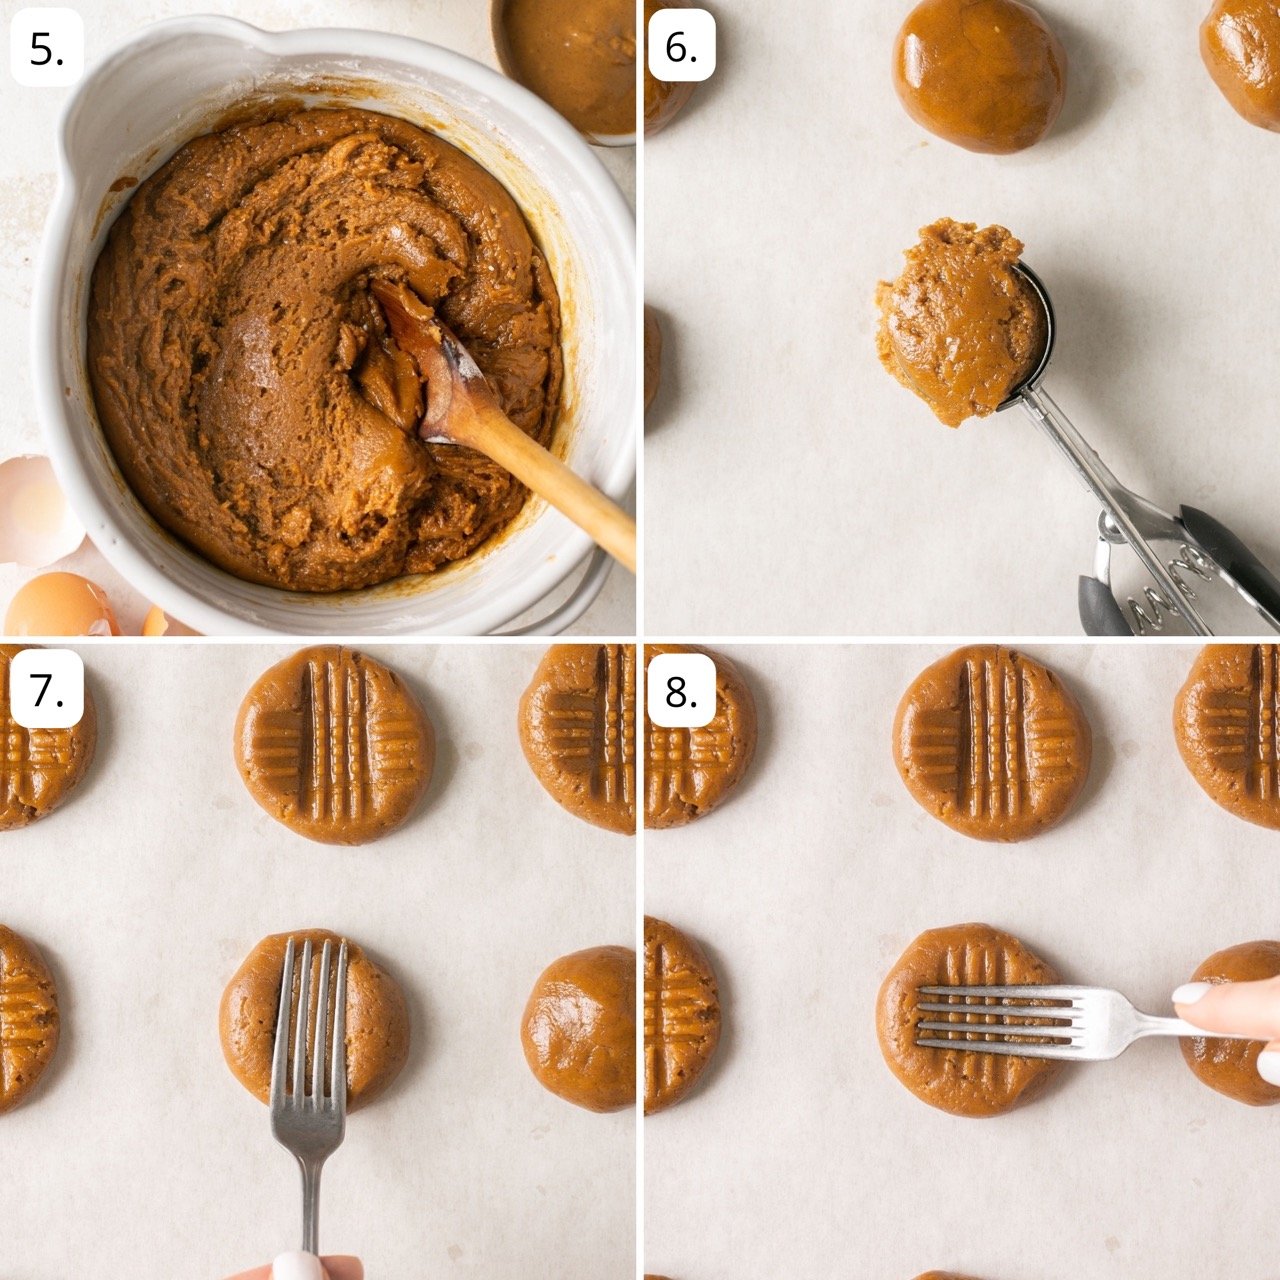
5. Form the dough into 30 balls – I like to use a 1-inch cookie scoop to keep them all the same size.
6. Place the cookie balls on your baking sheet 2 inches apart.
7. Use a fork to press down on each cookie to flatten and make a criss-cross imprint pattern on the top. Bake for 9-10 minutes.
8. Let the cookies cool completely. Enjoy!
Mary’s Tips & Tricks
- Gluten Free Peanut Butter Brands: Some excellent options are Thrive Market, Justin’s, MaraNatha, and Laura Scudders. Even popular brands like JIF and Skippy are gluten-free, however, I would opt for their “natural” versions for healthier ingredients and less added sugar. Always check for the gluten free label on peanut butter products just to be sure.
- Storage: Store your cookies at room temperature in an airtight container for up to 3 days. You can also keep them in a Ziploc bag or airtight container in the refrigerator for up to a week, or in the freezer for up to 3 months. See FAQs below for how to freeze the dough for later use!
- Double Batch: Chances are, you’re going to want to make a batch to eat, and a batch to freeze. Simply click “print” on the recipe below and increase the serving amount and the ingredient amounts will automatically adjust!
Recipe FAQs
Yes! You can freeze them after baking them or you can freeze the dough.
If freezing the dough, I recommend rolling them into balls and separating the layers in your freezer-safe container with parchment paper. This way, the cookie dough balls won’t stick together. Defrost overnight in the fridge when you’re ready to bake them, and bake according to the instructions in the recipe below.
Yes! Feel free to add ½-3/4 cups of either chopped nuts, chocolate chips, or peanut butter chips to your cookies if you prefer. I love Enjoy Life chocolate chips, which are gluten and dairy-free.
Most brands of peanut butter are gluten-free, especially if they just contain peanuts and/or salt! Always check your labels if you have Celiac or gluten sensitivity. Sometimes cross-contamination can be an issue during the manufacturing process, but many types are labeled gluten-free and totally safe!
More Gluten Free Cookies
- Gluten Free Chocolate Chip Almond Butter Cookies
- Vegan Millionaire Shortbread Cookie Bars
- Gluten-Free Peanut Butter Blossoms
- Almond Flour Gingersnap Cookies

Mary's Famous Gluten Free Peanut Butter Cookies
Equipment
Ingredients
- 1 cup smooth peanut butter
- 1 ¼ cups coconut sugar
- 2 tbsp maple syrup
- ½ cup vegan butter, I like Miyokos or Kite Hill brands
- 1 tsp vanilla extract
- 2 eggs
- 1 ⅓ cups gluten free all-purpose flour, I like King Arthur brand!
- 1 tsp baking soda
- ½ tsp baking powder
- ¼ tsp salt
Instructions
- Preheat your oven to 350.
- Combine the peanut butter, coconut sugar, maple syrup, vegan butter, vanilla, and eggs in a bowl and mix well.
- In a separate bowl, combine the gluten free flour, baking soda, baking powder, and salt and mix.
- Add the dry ingredients to the wet and stir to combine. Form the dough into 30 balls – I like to use a 1-inch cookie scoop to keep them all the same size.
- Use a fork to press down on each cookie to flatten and make a criss-cross imprint pattern on the top. Bake for 9-10 minutes.
- Let the cookies cool completely. Enjoy!
Notes
Nutrition
All nutrition facts are an estimate and automatically calculated. While I fact check them using My Fitness Pal, please note that they may not always be 100% accurate and depend on ingredients used. Weigh your total and divide by the number of servings for the most accurate grams per serving size.


Another incredible recipe. Made for family and friends.
I appreciate you!